If you’ve already set up your event, it’s time to dig into the ShowClix admin and create an event page that gets your ticket buyers pumped for the day of the show.
Our creative team has put together some attractive default templates, but you also have the option to customize your own colors for your ticketing page. You can even add tiled background textures or custom header images of your flyer or logo. After you set up your template, you’ll be able to direct ticket buyers to a place to buy tickets that looks and feels like your own website.
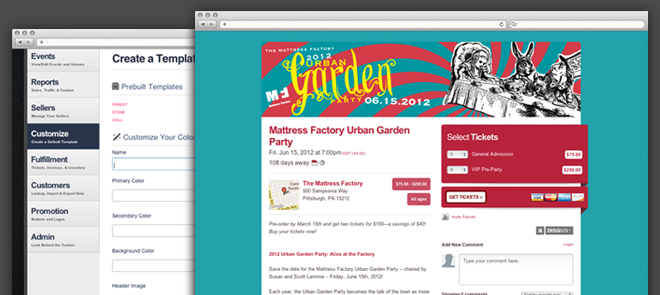
• Create an event page template. Click the “Customize” tab on the left menu on your admin dashboard and select “Create templates.” With this convenient menu, you can design your own page templates.

First, give your new template a name. To keep things simple, you could simply use the name of your event. Or if you have multiple types of events, enter a name that describes the general theme of the event (for example, “Holiday” or “New Year’s”).
• Edit the color scheme of the page. Click inside one of the color fields (“Primary Color,” “Secondary Color,” etc.). Use the color wheel and the shade box to adjust the color for each section of the event page.

Primary Color applies to the borders and objects in the main window on the page.
Secondary Color changes the color of the event description’s text.
Background Color affects the background area of the page, which remains static as visitors scroll down the page.
• Add custom images. With the same “Create templates” menu, you can add custom header and background images when you create your event page.
Header images should be sized to fit a width of 850 pixels, but they can be as tall as you want! Toss in a whole flyer image if you like—make sure you don’t bury your ticket info, though!

Meanwhile, background images can be any size. We recommend keeping it simple with a background texture from your own website or a single large, high-resolution graphic.

• Apply your template to your event page. Now you can add your shiny new template to your event. Click the “Events” tab and select your event from the list.
Next, under the “Customizations” section, click “Assign a template.” Simply select the event page template you created. Click “Assign.”

And you’re done! That’s all it takes to create your own event page! Keep in mind that this template stays in front of your customers throughout the entire ticket purchase process, so they’ll be able to trust that they’re buying tickets directly from you.
Now it’s time to get out there and promote your event with its awesome new page!
Want to get started? Create an event today!
Â