This week, we’ll learn how to add your events and the entire checkout process to a tab on your organization’s official Facebook Page.
With our Facebook Checkout tool, you’ll be able to sell tickets to your followers on Facebook — they won’t even have to leave the site to browse your events! Just connect and set up our Facebook app to get started.
Estimated time: 2-3 minutes
Visit the Facebook Checkout tool.
- Click Marketing and click the Facebook Checkout button.
Link your Facebook account.
- First, you’ll have to give us permission to connect your ShowClix account with your Facebook account.
- Make sure you’re logged in as the personal Facebook account you use to manage your organization’s official Facebook Page.
- Click the Link your Facebook account button. When prompted to allow the app to access your account, click Okay on all of the confirmation screens. (Don’t worry! We’ll never post to your personal account — we just need to be able to add a button to your org’s Facebook Page.)
- You’ll be returned to the Admin. Now you can select the Facebook Page you want to use with the ShowClix app and click Install.
Customize your Facebook app.
- It’s time to customize the look and functionality of your Facebook app.
- Just like with our standard event templates, you can add a custom header image and edit the color scheme. Alternatively, you can stick with our default Facebook color scheme, which is designed to match Facebook’s palette.
- You can further customize your app with the other options, such as whether to display a calendar or a basic horizontal list of your events.
- The Show Events List option is especially important. By default, your Facebook Page’s app will display a calendar of your upcoming events. However, you can click No and specify one event to display instead.
- Click Save Changes.
Adjust your Facebook page.
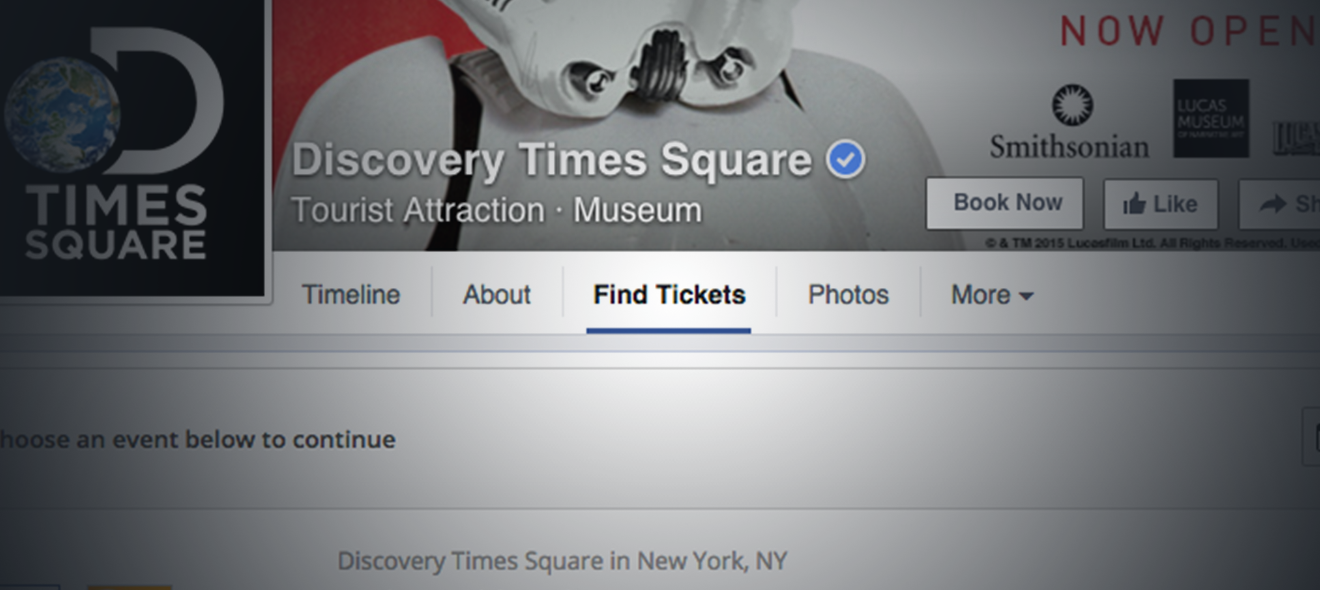
- Now all you have to do is make sure people can find your Find Tickets button when they visit your Facebook Page.
- While signed in to Facebook as an administrator of your Facebook Page, visit the Page and click the More tab below your cover photo.
- Click Manage Tabs.
- Drag the Find Tickets tab closer to the top of the menu and click Save. The button should now be visible just underneath your cover photo.
Looking for other ways to make the most of ticket sales on your Facebook Page? Return to the Marketing page in the Admin and add a tracking tag. Then you’ll be able to see a total of all the sales that came from this campaign!